Expiration Date on Lot Numbers
| 1. | In this enhancement, Expiration Date is added on Lot Numbers so each lot number can have its own expiry date. These expiry dates can be seen in all forms where lot numbers are also displayed. |
Here are the forms where Lot Numbers can be seen:
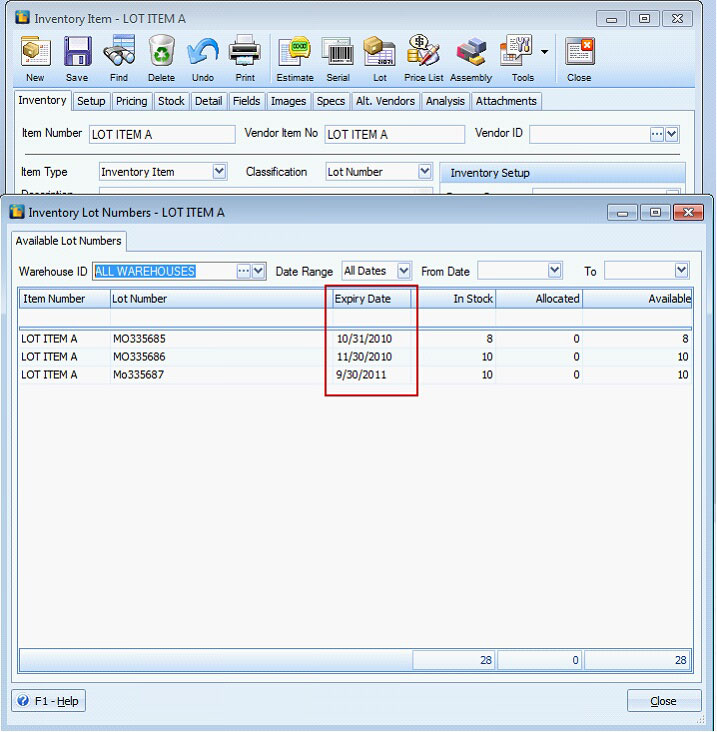
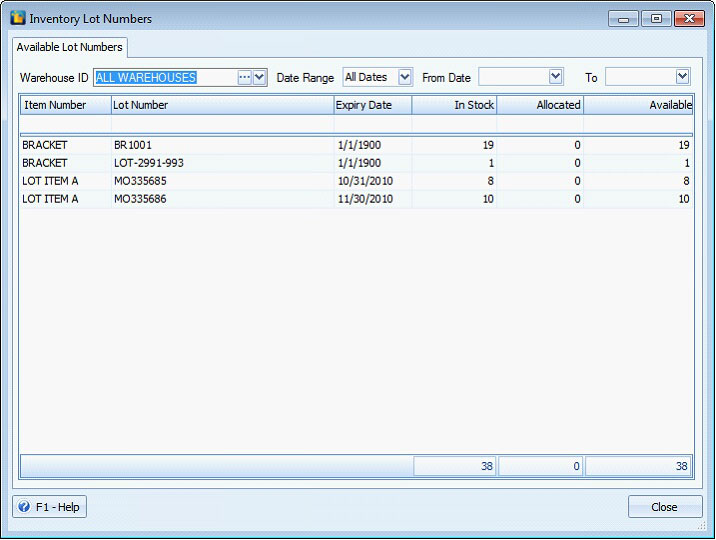
Inventory Lot Numbers Form
This can be opened from Inventory form then click on the Lot button. Make sure that the item selected is a lotted item.
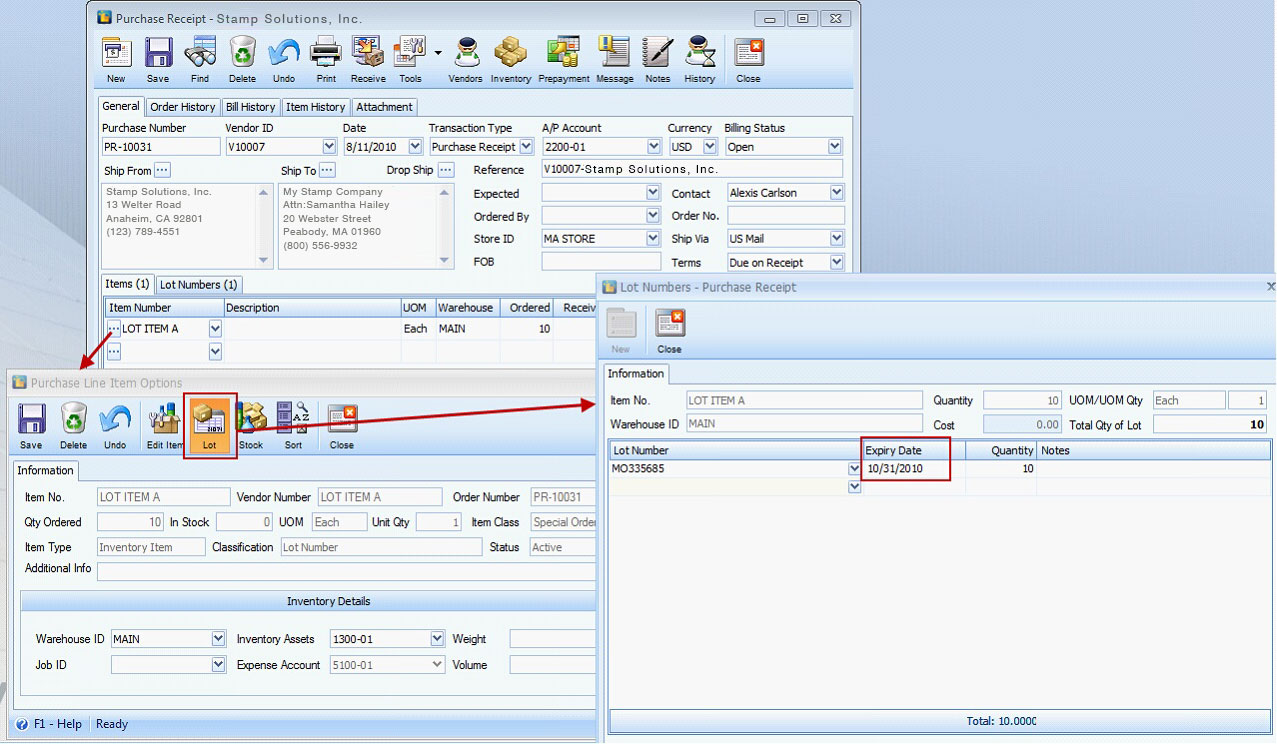
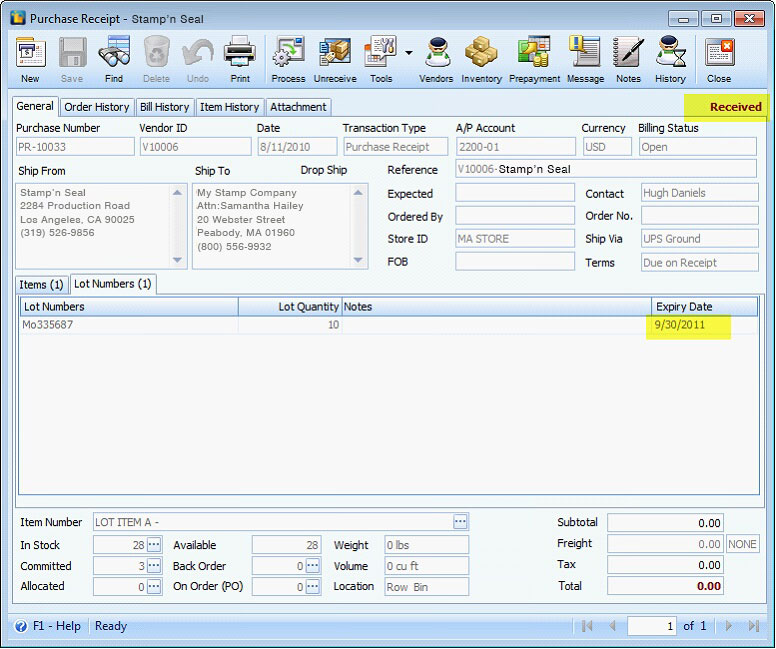
Purchase Receipt
Click ellipse button on the lotted item to open the Purchase Line Item Options form. Click Lot button on that form to open Lot Numbers – Purchase Receipt form.
How to add Lot Numbers and assign expiry date
In the Purchase Receipt form, add lotted item. Enter a number on the Ordered field and Lot Numbers – Purchase Receipt form will be opened.

In the Lot Numbers – Purchase Receipt form, click the New button or add lot number on the fly (type in the lot number in the Lot Number field of the Lot Numbers – Purchase Receipt form and press enter) to open the Warehouse Lot form where you can add lot number details for specific items to be received.
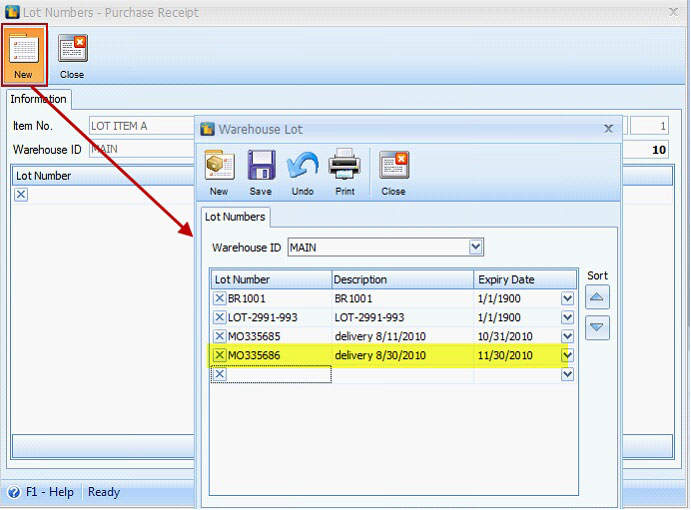
Save and close Warehouse Lot form and you will be back at Lot Numbers – Purchase Receipt form. Select the newly added Lot Number and Expiry Date field will automatically be populated with the Expiry Date assigned. Then enter the quantity for that lot number and some notes to better track your lot numbers later on.
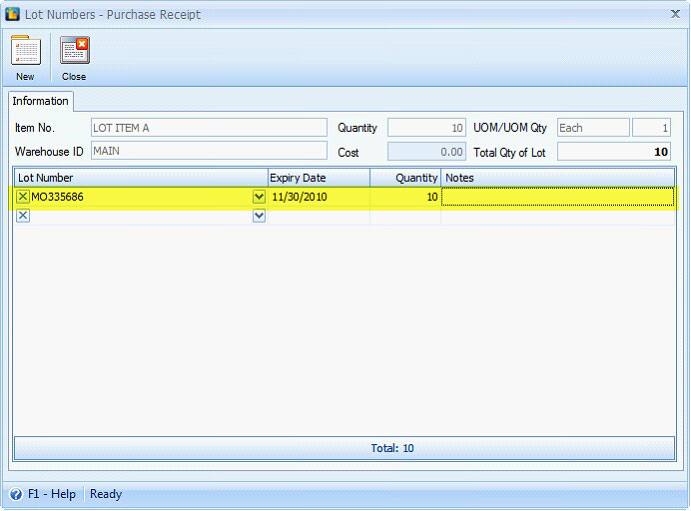
Click Close button and you will be back at Purchase Receipt form. Notice that Received field will be populated by the same Total Quantity specified in the Lot Numbers – Purchase Receipt form.
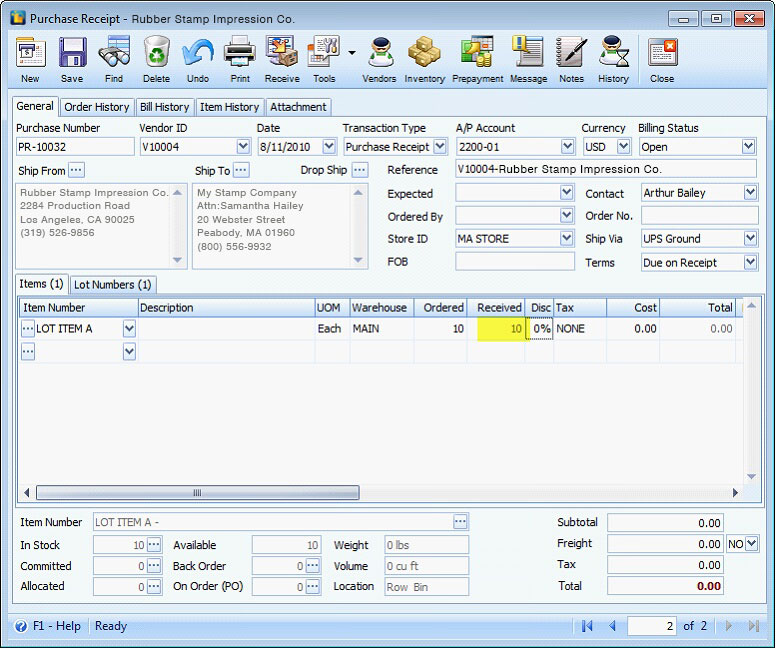
Also, the Lot Numbers tab will be shown letting you see the lot number details.

Sales Invoice
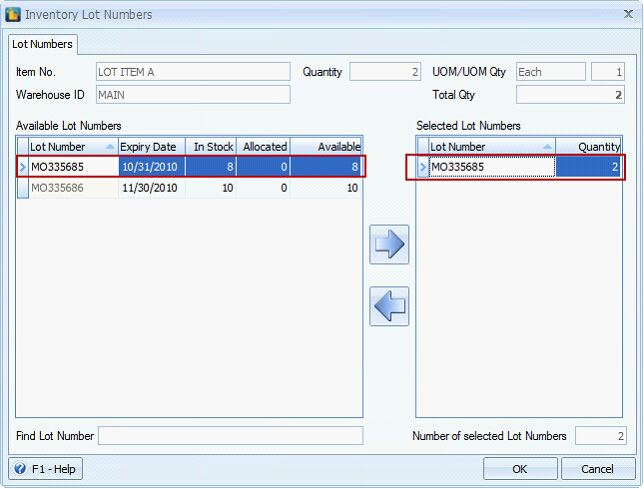
Select lotted item and enter a number on the Ordered field to open Inventory Lot Numbers form.
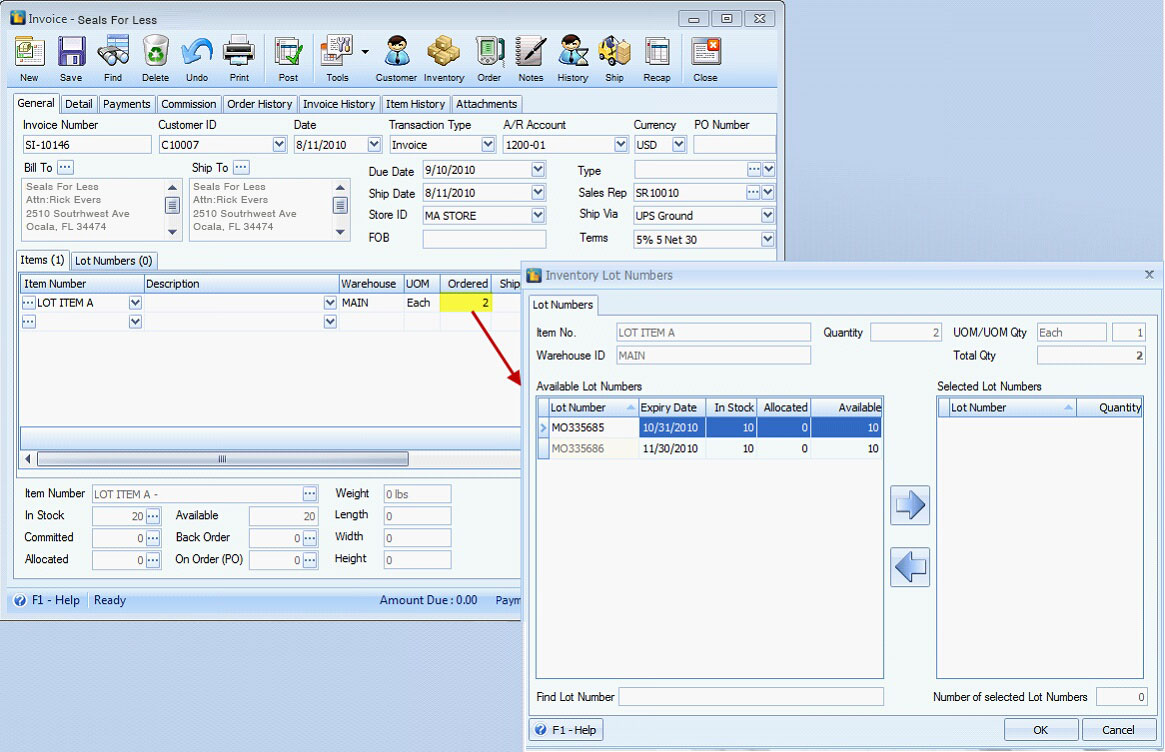
In the Inventory Lot Numbers form, select the Lot Number and click arrow right button. Then enter the quantity and click OK.
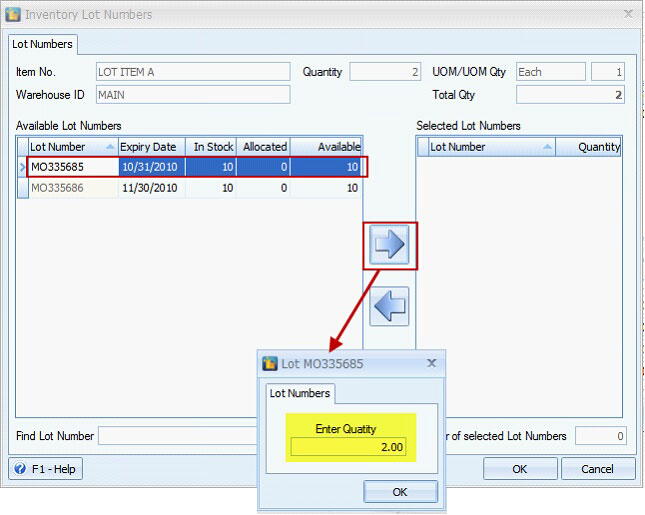
Notice that Available Lot Numbers and Selected Lot Numbers section gets updated.
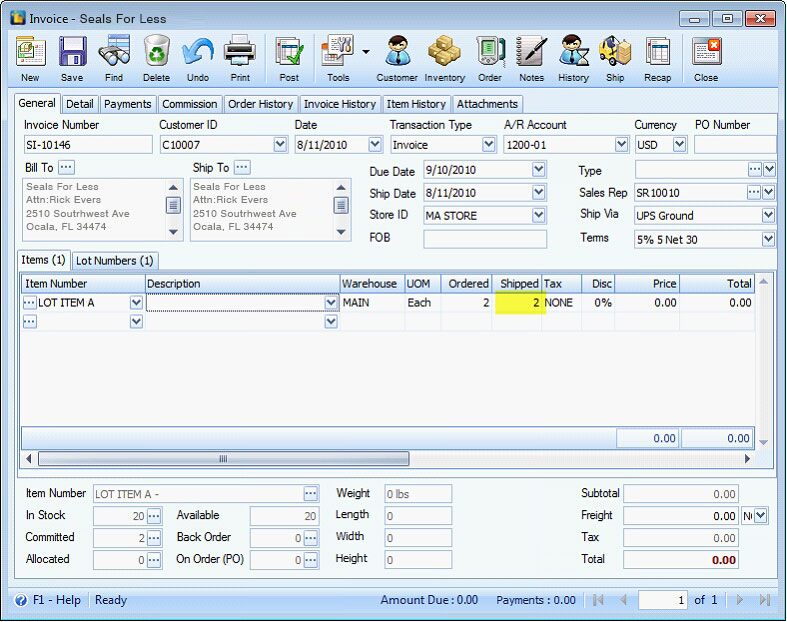
Click Close button and you will be back at Invoice form. Notice that Shipped field will be populated by the same Number of selected Lot Numbers Quantity specified in the Inventory Lot Numbers form.
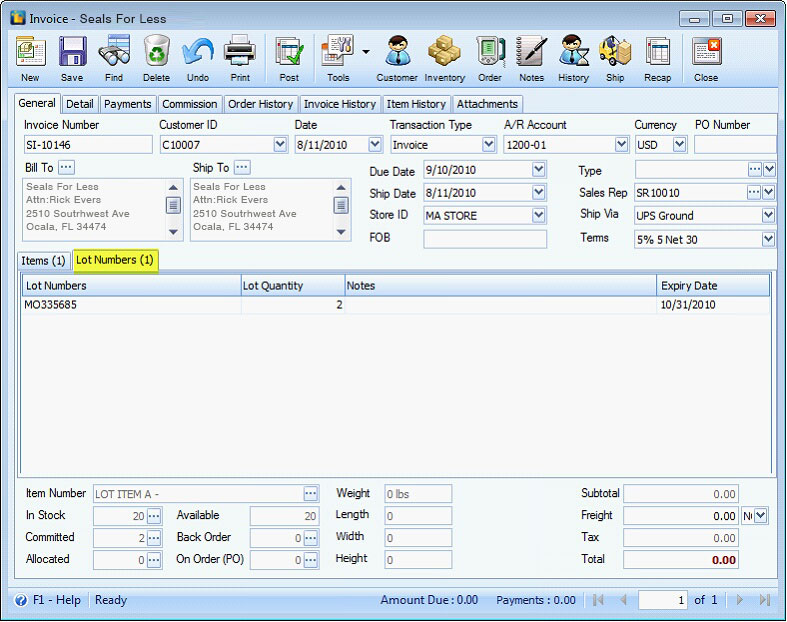
Also, the Lot Numbers tab will be shown letting you see the lot number details.
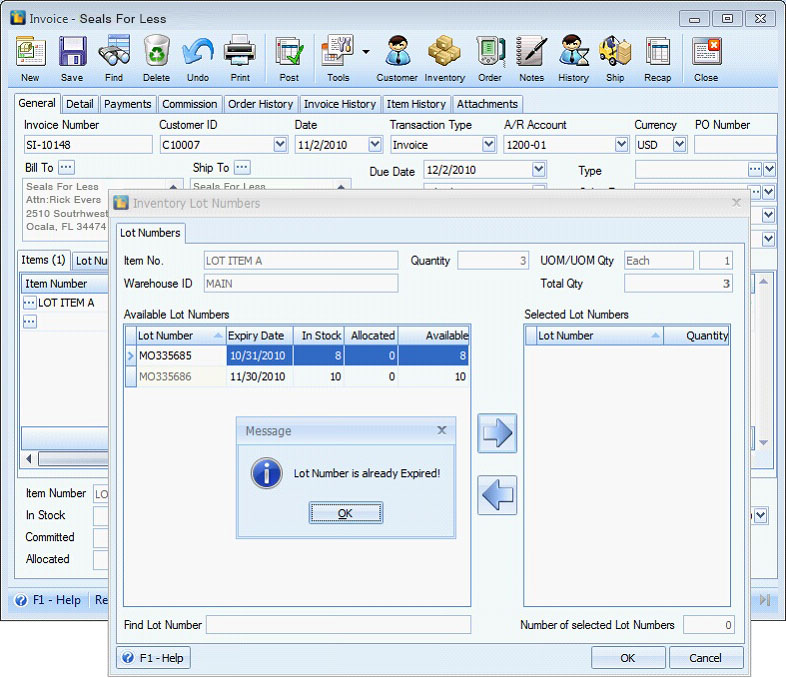
Say the lot number is already expired and you selected the specific lot number (sold the item beyond the expiry date), clicking the right arrow button to transfer the item onto Selected Lot Numbers section will show this message stopping you from selling it.
The Inventory Lot Items under Inventory menu is added

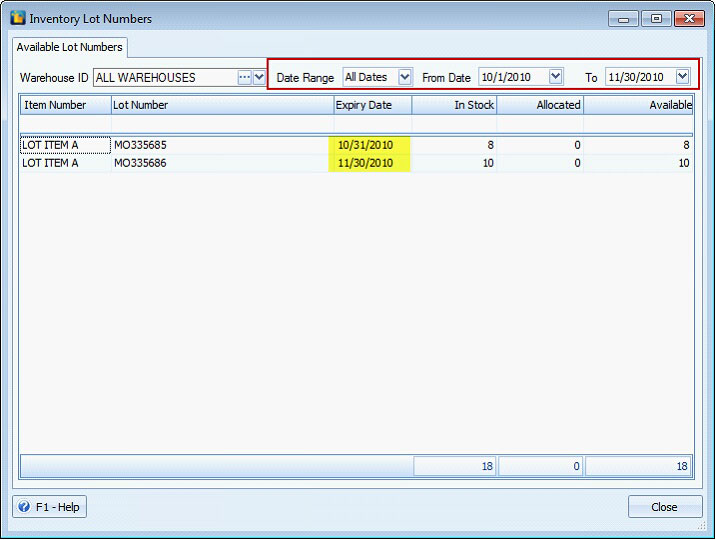
and can be used to list all Lot items. This form has a filter row shown below the column header to allow you to search for lot items/numbers. You can also use the Date Range field to help you filter out lot numbers within a specified expiry date.
Example:
You are filtering items with expiration date from 10/31/2010 to 11/30/2010.
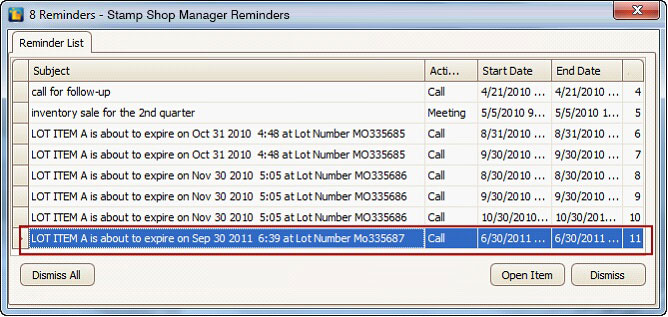
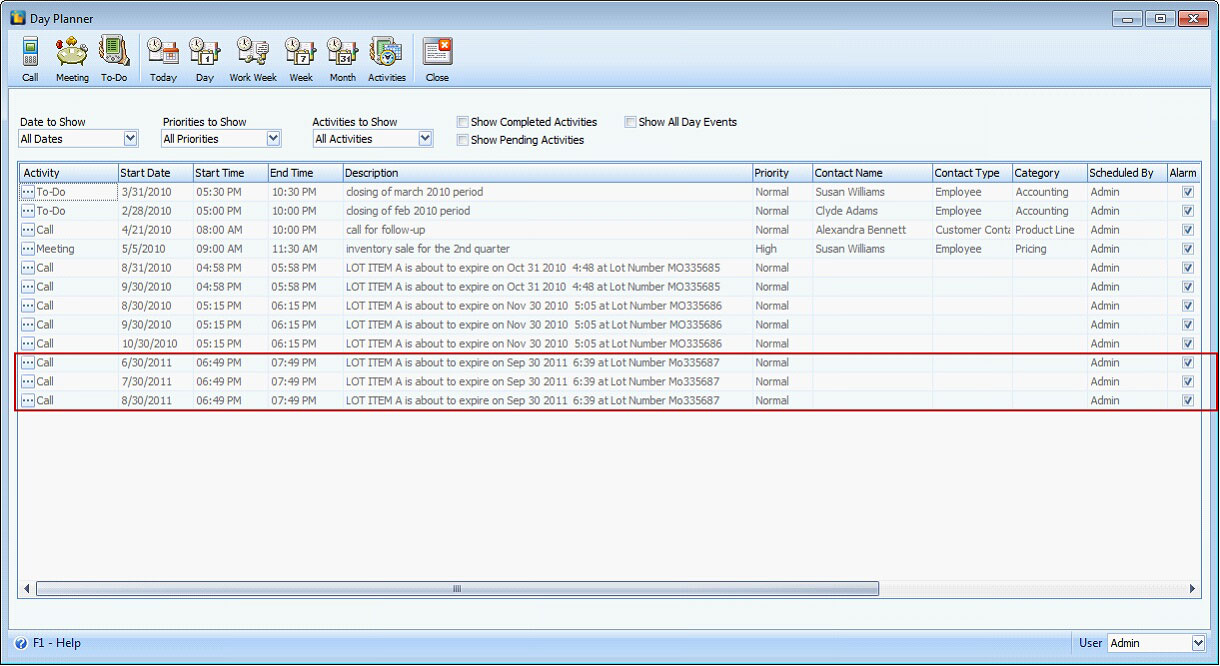
Also, message Notifications are placed to prevent items from being sold if the expiry date passes. Once item is received in the Purchase Receipt transactions, the system automatically inserts reminder records on the Scheduled Activity form.
Example:
The Purchase Receipt below has a lot item where lot number will expire on 9/30/2011.
Once it is received, 3 reminder records will be created, one for 3 months in advance, one for 2 months in advance, and one for one month in advance before the expiration date. These reminders can be viewed from the Day Planner form (can be opened from CRM menu > Activities). Using the above example, records created in the Day Planner will have the following dates: 6/30/2011, 7/30/2011 and 8/30/2011.
You can also set the time you want the Custom Vantage Office Reminders form to alarm. Just click on the ellipse button before the activity to open the Schedule Activity form.
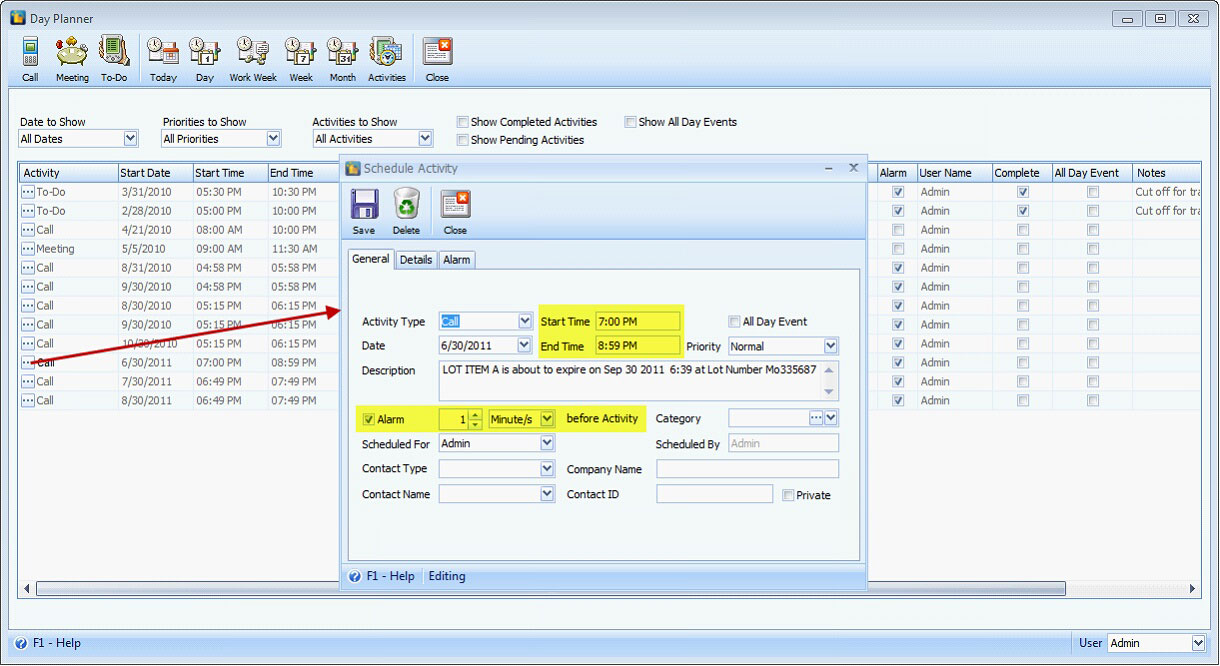
Make sure also that you enable the Enable Custom Vantage Office Reminders option in the User Preferences form > Day Planner tab so the alarm will be shown on the time set. This is how the Custom Vantage Office Reminders form looks like.