|
<< Click to Display Table of Contents >> Add New Chat Representative |
  
|
|
<< Click to Display Table of Contents >> Add New Chat Representative |
|
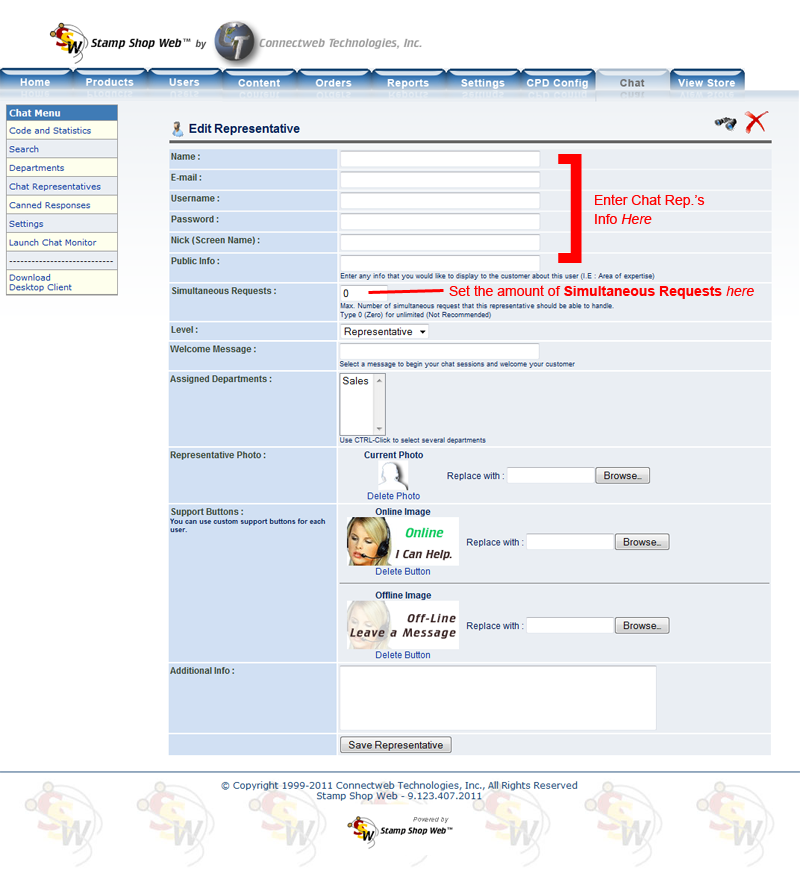
To add a new representative, click on the Add New Rep. button located in the upper right corner and provide the necessary information (you can also assign a custom support button for each user).
|
Setup New Reps (and Admins)
Only System Administrators will be able to edit and create new representatives. To do so, just click on the “Add New Rep.” button and you’ll be brought to the Edit User screen.
You’ll need to provide the following information:
| • | Name, E-Mail: Enter the name and e-mail of the new representative. |
| • | Username and Password: type a username and password for the new user. |
| • | Nick: A short name to be used during the sessions with the customers. |
| • | Public Info: Any additional info that you would like to display to your customers about the representatives (I.E: Area of expertise). |
| • | Simultaneous requests: Type the total number of requests that the user will be able to handle simultaneously. You can type 0 (Zero) to set an unlimited number, but please note that if too many requests are received by this representative at any given time, the representative might not be able to provide the correct level of support to each of the customers. |
| • | Level: Select if the user will be a representative or an administrator. |
| • | Welcome Message: A message to be displayed to the customers when a session is started (e.g. “Hi! My name is John. How may I help you?”) |
| • | Assigned Departments: The Departments to where the representative. Will be assigned to provide support. |
| • | Representative Photo: You can upload a photo for the current representative so that it gets shown to the customer. |
| • | Support buttons: You can assign custom buttons in order to connect your site visitors with the representative directly. |
| • | Additional Info: Enter any additional info for the representative (phone number, address, notes, etc). |
Click the “Save Representative” button. The new user will be created and you’ll be taken to the “View Representative” screen where you can see the entire representative’s information including the code to display buttons that directly connect with the current representative, number of attended requests and average session rating.
Note: If you change or edit your own properties, some of your new settings won’t be available unless you log again into the application. If for instance you change your welcome message, it will not be available unless you log into the application again.