|
<< Click to Display Table of Contents >> Images |
  
|
|
<< Click to Display Table of Contents >> Images |
|
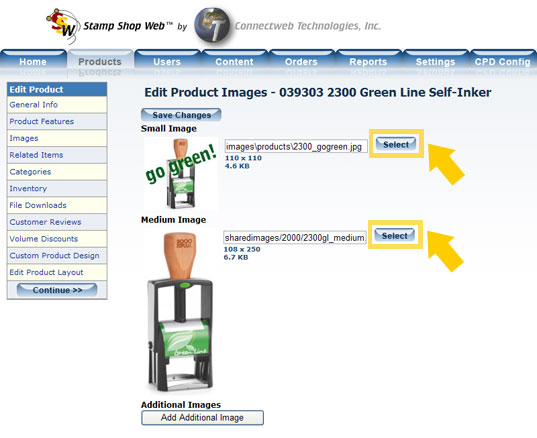
Within the Images link you can add small or medium images to the product.
Change the Small or Medium Image:
| 1) | To change the small or medium image first click the select button. |
|
| 2) | Once you click the select button your screen will refresh and you will now see the browse/upload images page. |
|
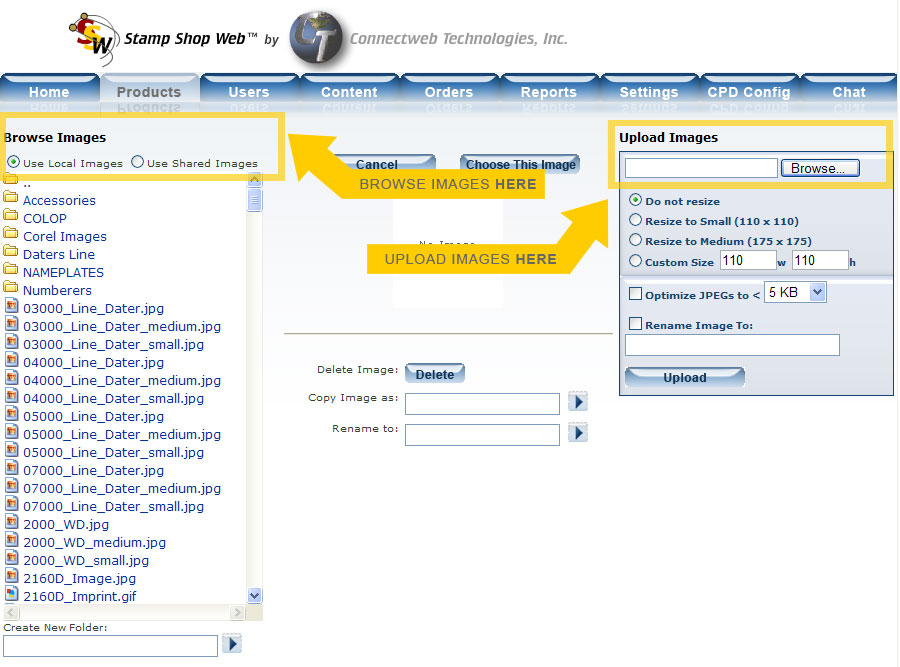
| 1) | The Browse Images section contains the option of viewing images that are within your Local Images folder or within the Shared Images folder. |
Local Images: images that only reside on your site
Shared Images: images that are shared throughout all Stamp Shop Web™ websites
| 2) | Select which folder you would first like to browse by clicking on the Local Images or Shared Images radio buttons. |
| 3) | Below the radio buttons you will see folders within the Local or Shared folder, as well as images listed below the folders. Click on any image to see a preview of the image in the center of the screen. To view inside other folders with either Local or Shared click once on the folder icon to move inside the folder, to move back out of the folder click on the first folder icon at the top of the column. |
| 4) | Once you have selected which image you would like to use click on the image so it previews in the center and then click the "Choose this image" button directly above the preview image. |
| 1) | On the right of the screen you will see the Upload Images area. Click the "Browse" button to locate the image on your local computer and click open, once you have found it. |
| 2) | Next determine whether you would like the system to resize the image for you (Resize to small, Resize to Medium, Custom Size, etc) the default is set to "Do not resize." |
| 3) | Next choose to optimize the JPGs to less than (and select the file size in kilabites). |
| 4) | Next, choose to rename the image to whatever name you would like, simply type in the name in the field provided. This is not required. |
| 5) | Click the upload button to add the image from your local computer to the "Local Images" folder. |
| 6) | The last step will be to locate the image within the "Browse Images" column (located to the left of the screen). |
| 7) | Once you have located the image click on it so it previews in the center of the screen. Click the "Choose this image" button. |
To add additional images, scroll down and click the "Add Additional Images" button. This will bring you back to the choose this image page where you can either browse or upload new images. Follow the same instructions above to either browse for images or to upload new images.