PO Ship To
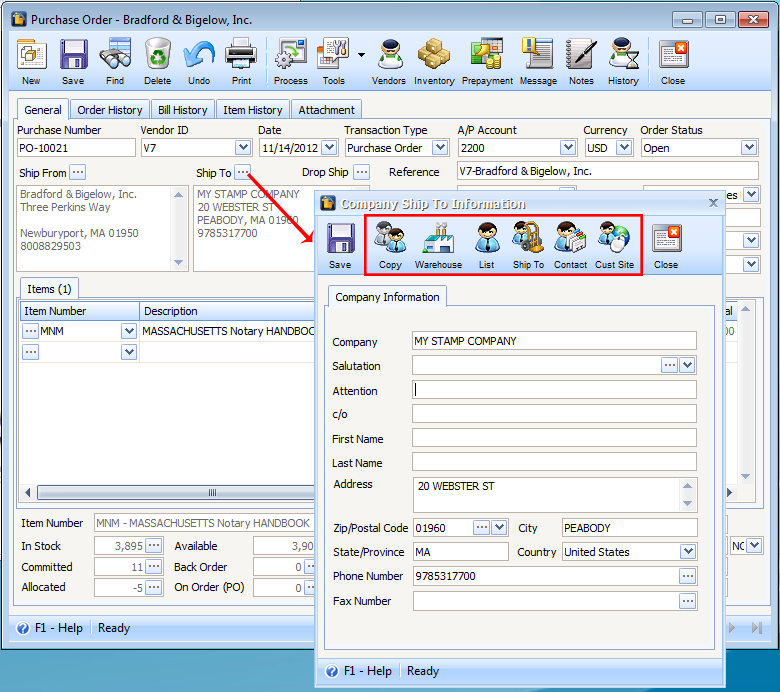
Clicking the ellipse button next to Ship To address field will now open the Company Ship To Information form. This form gives the user the flexibility to select Ship To address through these buttons: Copy, Warehouse, List, Ship To, Contact and Cust Site buttons.
| • | The Copy button will automatically fill in all the fields in the company ship to information form with the data entered in the Company Setup form. |
| • | The Warehouse button will open the Warehouse List form where you can pick from a list of warehouses to automatically fill in all the fields in the company ship to information form. Warehouses are setup in the Warehouse form. |
| • | The List button will open the Customer List form where you can pick from a list of customers to automatically fill in all the fields in the customer ship to information form. Customers are setup in the Customer form. |
| • | The Ship To button will open the Customer Ship To List form where you can pick from a list of customer ship to to automatically fill in all the fields in the customer ship to information form. Customer Ship To Information are setup in the Customer Ship To Information form. |
| • | The Contact button will open the Customer Contact List form where you can pick from a list of customer contacts to automatically fill in all the fields in the customer ship to information form. Customer Contacts are setup in the Customer Contact form. |
| • | The Cust Site button will open the Customer Contact Site list form where you can pick from a list of customer contact sites to automatically fill in all the fields in the customer ship to information form. Customer Contact Sites are setup in the Customer Site form. |
This change is implemented in Purchase Order, Purchase Receipts, Return to Vendor, Debit Memo, and Bills
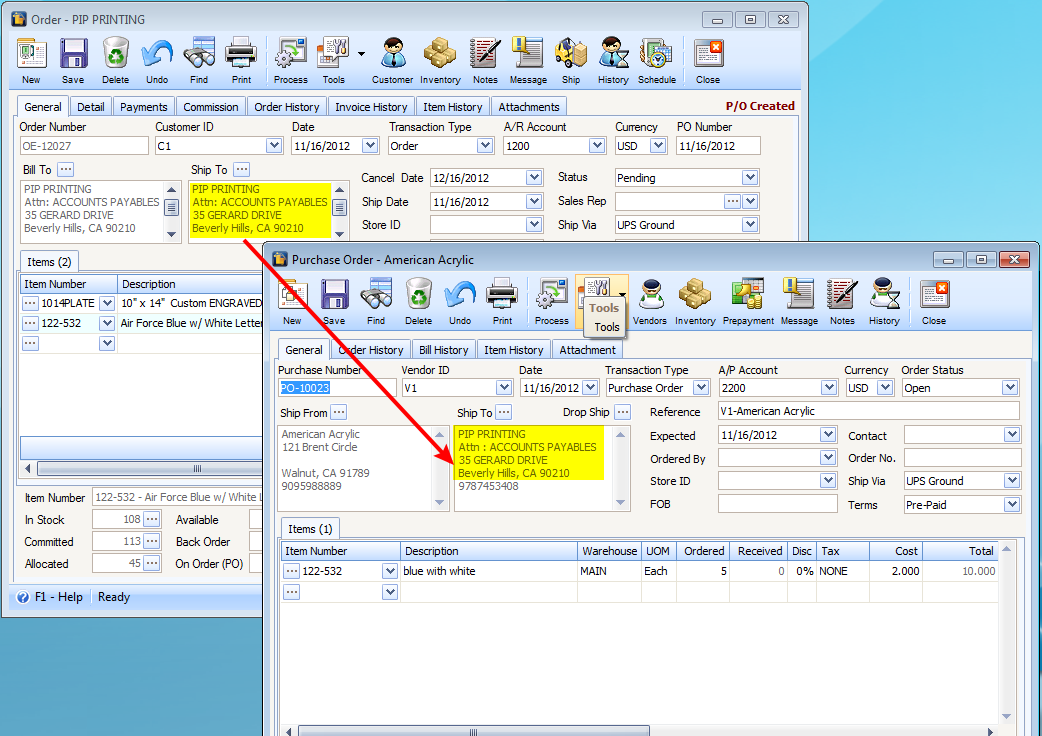
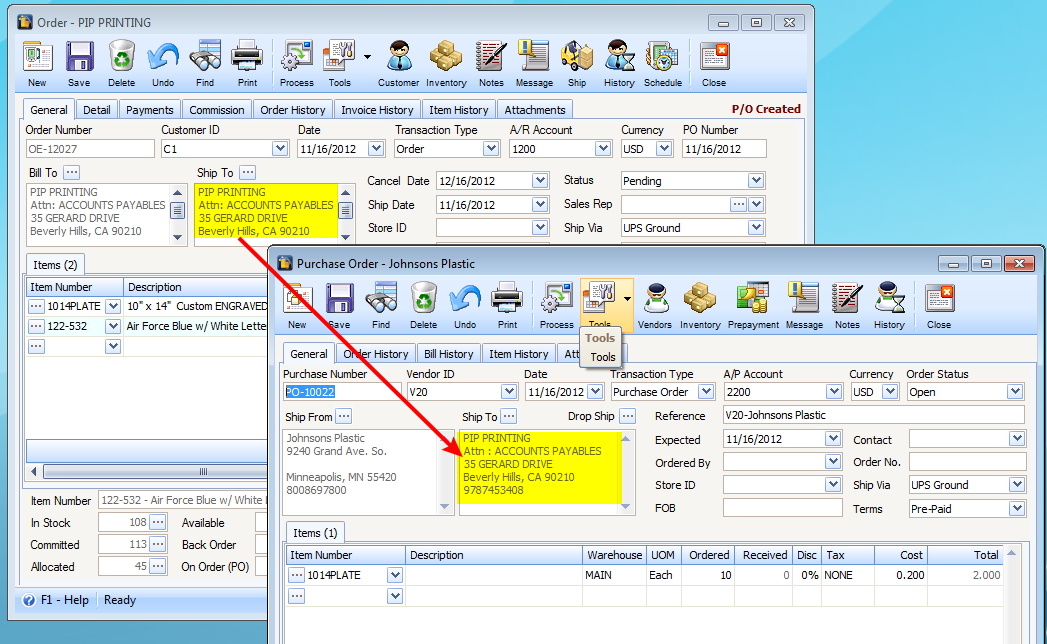
Another change made for Ship To is when processing a Sales Order to Purchase Order [Drop Ship Selected] or Purchase Order [Drop Ship All], the same Customer Ship To Address is being used by the Purchase Order created > Ship To address area.
See Convert Order to Purchase Order [Drop Ship Selected] and Convert Order to Purchase Order [Drop Ship All] to guide you on how these processes work.
Here’s a detailed illustration on how PO Ship To works.
In Sales Order click Process button and select Purchase Order [Drop Ship Selected] or Purchase Order [Drop Ship All]. Then click OK.
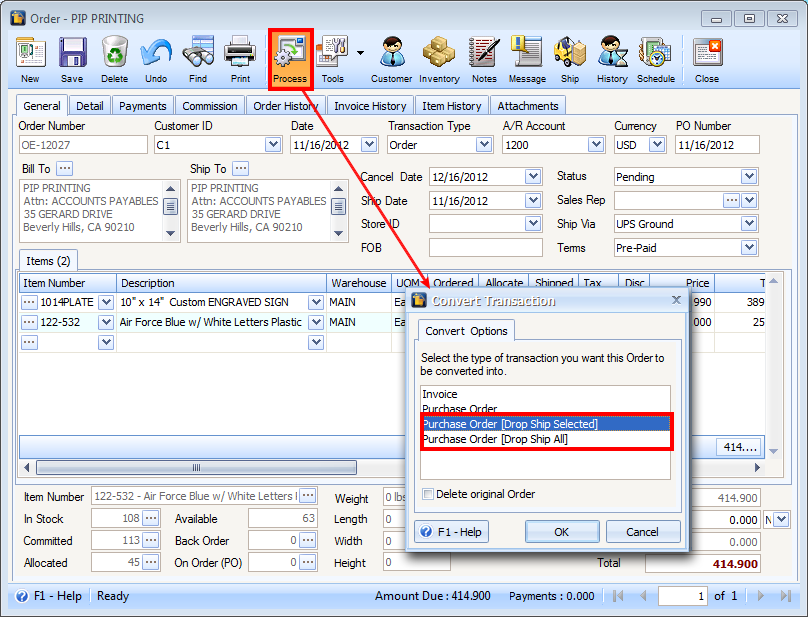
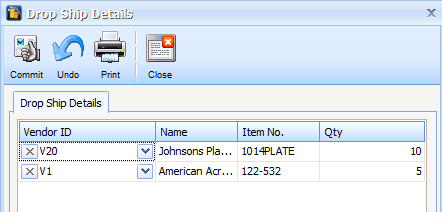
Clicking OK in the Convert Transaction mini form will open the Drop Ship Details form listing all/selected the items in the Order form. In this form you can modify the Vendor ID and Qty fields as needed. There is also a delete button before each line item giving you the ability to remove the item from the list.
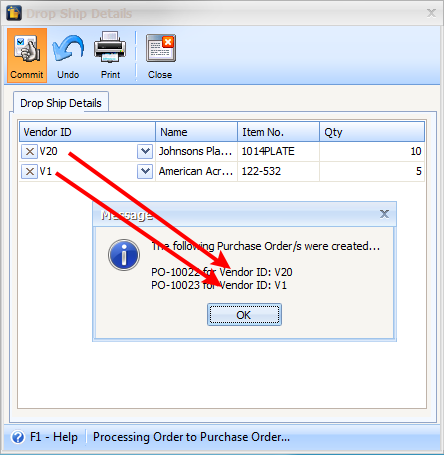
When you are through and have finalized the items to be dropped ship, click the Commit button. This message will then be shown giving you the Purchase Order number/s created. Click OK.
The Order will now be tagged as P/O Created.
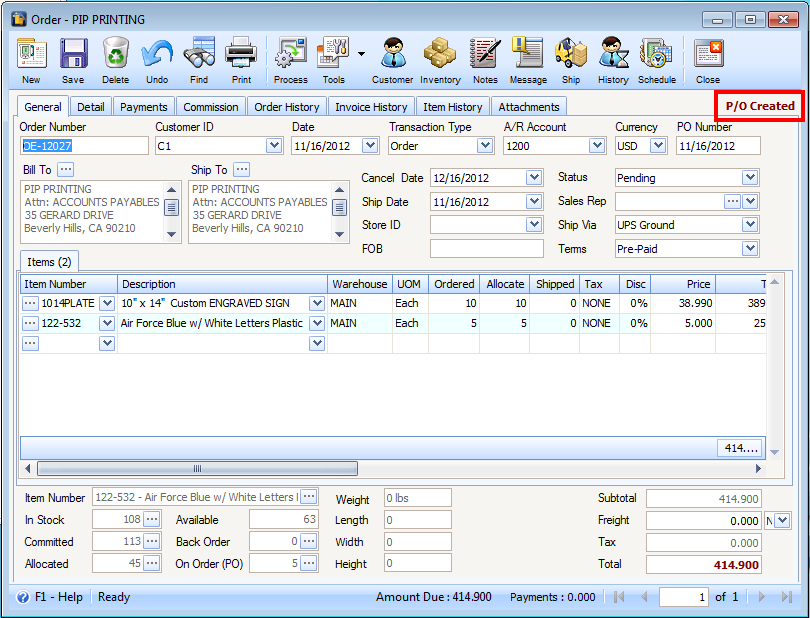
When you open the Purchase Orders created, notice that the Ship To address area displayed in the Purchase Order form is the same customer’s ship to information set in the Order form.