|
<< Click to Display Table of Contents >> Accessory Checkboxes |
  
|
|
<< Click to Display Table of Contents >> Accessory Checkboxes |
|
Once you have selected Accessory Check boxes click the new button.
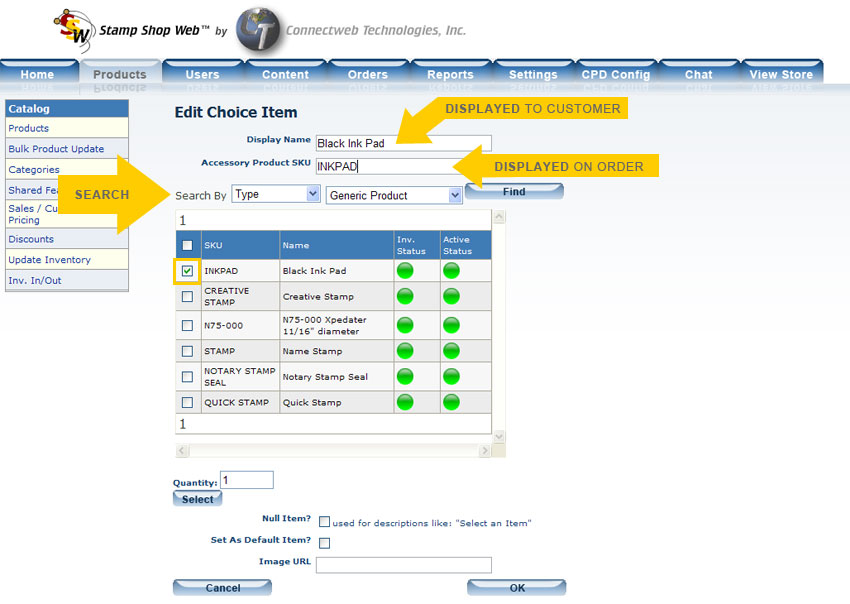
Next you will need to type a "Property Name" which will be for the admin section only and then type a "Display Name" which will appear to customers.
Next you will add the items or products that will be available for the customer to add to their cart. Click the new button to find the product(s) and add them to this checkbox.
Once you click the new button you will be able to give the accessory a display name, as well as a accessory product SKU which will be displayed on the order. Next you can search for the product you would like added and find the product.
|
Once the product has been found check the box next to the SKU to select the product and then click the select button near the bottom of the window.
Before you click ok there are additional options to select from, you can make this product a null item, or set to be the default (which means it will already be checked for the customer), or add an image path to display an image next to the accessory checkbox. Next click the ok button to save your changes.
Once you have added all the items you would like displayed for the customer click the ok button to save the accessory checkbox.
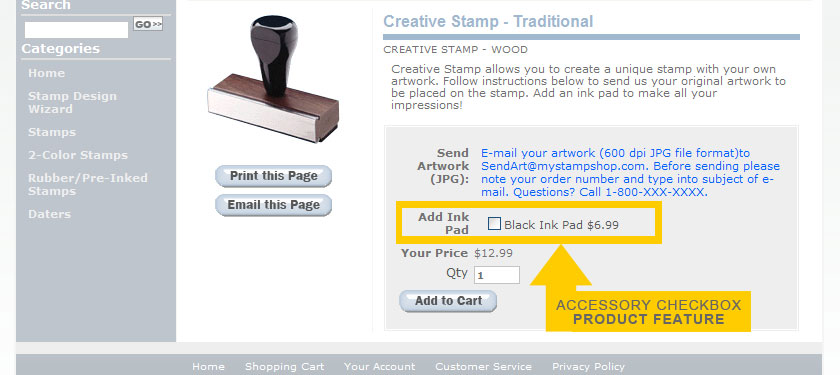
Customer's View:
|