|
<< Click to Display Table of Contents >> Add New Department |
  
|
|
<< Click to Display Table of Contents >> Add New Department |
|
Once you click the "Add New Department" button you will see the screen below.
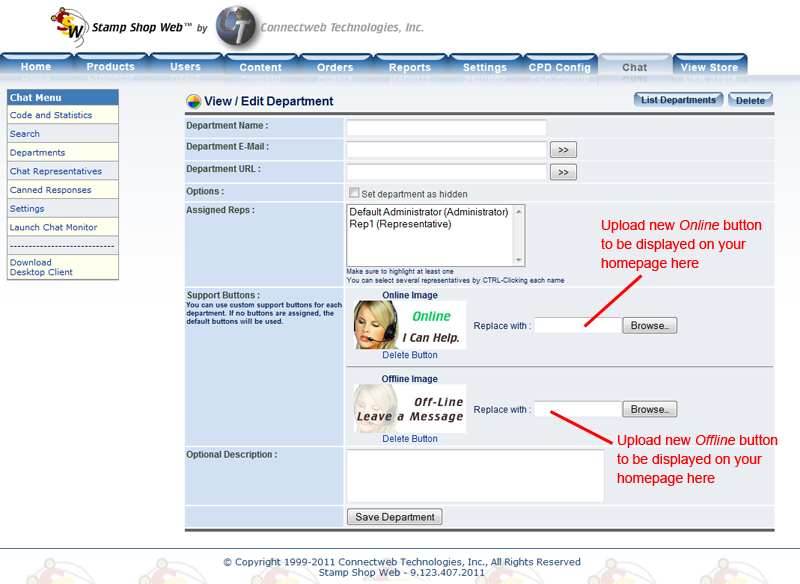
Setup New Departments:
You can register a new Department by clicking the “Add New Department” button. You’ll need to provide the following information to register a new Department:
| • | Department Name: Type a name for the Department. |
| • | Department E-mail: Required. E-mail address to send the messages left by customers when the department’s representatives are busy or off-line. |
| • | Department URL: If the department has a web page or Intranet, you can type it here. |
| • | Options: Set if the department should be hidden and not available for general access. In most organizations, there is a first line of representatives who handle the entire incoming support request. These representatives can then pass calls to their supervisors or managers available in departments that are only available for critical situations. This option is very useful in this case. |
| • | Assigned Reps: Select the representatives that will provide support for the new Department. You can also assign users to a Department when registering new users. Make sure to assign at least one representative by clicking on its name and highlighting it. You can also choose multiple representatives by pressing the CTRL key while clicking on their names. |
| • | Support Buttons: You can assign custom buttons for each department and use the code in the departments screen to display them. To assign a custom button, select the online and offline images that you would like to use from your local PC using the browse button |
| • | Optional Description: You can provide a short optional description about the Department. |
Step-by-Step Setup:
You can create as many departments as you would like. Setting up different departments will assist your customers in contacting you for help using the Customer Chat System.
| 1.) | To create a Department, click the “Add New Department” button in the top right of the “Departments” link within the chat tab. |
| 2.) | Enter the New Department Name and a short description of the Department (optional) in the corresponding fields. If the Department has a URL and e-mail assigned, type them into the appropriate fields (an e-mail is required for sending e-mail messages). |
| 3.) | Assign Representatives to the Departments: In order to provide live support, you must at least assign one representative to each department. You can select several representatives by CTRL-Clicking on each representative’s name. |
| 4.) | You can also assign a custom support button for the department as well as provide an optional description. |
| 5.) | Press the Save Department button. |
| 6.) | The Department will be created and its name will be added to the Departments list. |
| 7.) | You can add as many Departments as you want and further assign representatives to any Department. |
Note : When you register a new department, Customer Chat automatically assigns an ID to it. This ID is used in the support button code by passing the parameter “d.”
If you add this same parameter to the visitor tracking code from the start screen, you’ll set pages that can only be tracked by a selected department. For example, a visitor tracking code like this :
<script language="JavaScript" src="/sswchat/vtrack.aspx?d=22"></script>
Will make any page containing that code to be only tracked by representatives from department with ID 22. This is useful if you want certain areas of your site to be visible to specific departments and representatives.